How to do a Website Rebuild and Retain SEO Ranking
There will come a time when you will need to rebuild your website. Some of the reasons may be because you’re re-branding, you want to install a new content management system (CMS), you added a new functionality such as e-commerce or membership registrations, you made your website responsive, or just simply because you have gone tired of the look and feel of your website.
One of the biggest problems that you may encounter after a website rebuild is having a big decrease in organic traffic due to drop in search engine rankings. It’s not unheard of to see websites drop from page 1 to page 10 after a design overhaul due to changes in its code, architecture and content. To mitigate the effects that a redesign might have on your SEO performance, I made a list of 24 SEO best practices that you should consider when redesigning your website.
I have divided the list into 2 phases: Pre-launch and Post-launch.
Pre-launch
The Pre-launch phase covers the time from the development phase of the new website until you upload it to the live server. Thorough planning during the pre-launch stage rewards you with a much easier time during the post-launch phase. These are the things that you should consider during this part of the website rebuild process:
1.) Never put down your website during rebuild.
You must never ever close down your website during a website rebuild. Period. Replacing your current site with an “under construction” landing page will obliterate your rankings. You will lose all your indexed pages and, in worst case scenarios, Google may de-index your site completely. The only downtime your website should experience is during migration when you replace your old website with the new design. If possible, there should be no downtime at all. Other than that, you must do everything humanly possible to keep your website up and serve content.
2.) Coordinate with all the individuals who are working on the website
This is an important step that is often overlooked. If you are the web designer, make sure you collaborate with the SEO and PPC specialist, social media manager, the company’s IT personnel and anyone else who’s working on the website. Ask them if they have any special instructions or if they have any input on the new website’s design and features. For all you know, they may have important pages, codes, databases, or files uploaded in the server that you might wipe out during your redesign which could result to a complete disaster.
*** PRO TIP : Once you complete the new website in the staging server, it is best if you ask all the individuals who are handling the site to double-check it just in case you missed anything or if they want to have last minute changes.
3.) Perform SEO Site Audit and re-evaluate your keyword strategy.
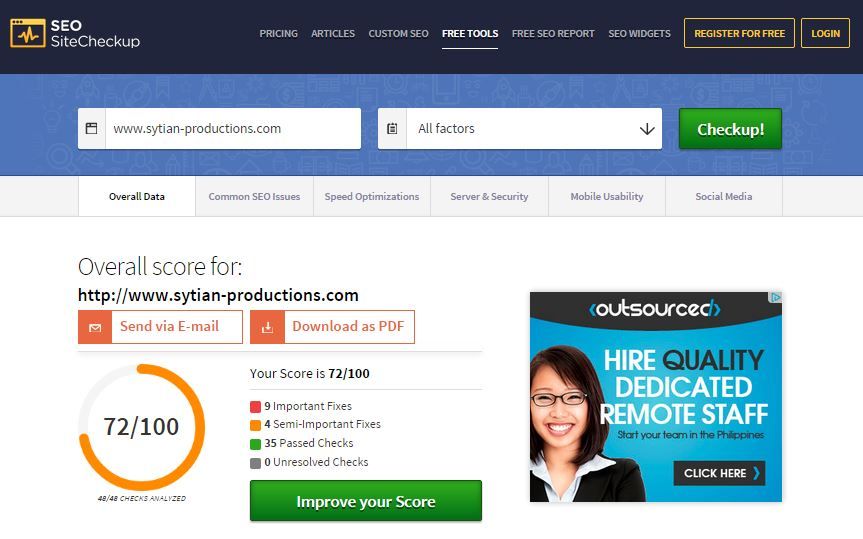
Examine your current website and check for errors that impede search engines from properly indexing your site. Look for problems that prevent your website from getting better organic search engine rankings so that these issues can be fixed during the website rebuild. SEOSiteCheckup is a free tool which helps you assess your website’s issues in terms of SEO, page speed, server and security, mobile usability and social media. You simply type your URL and you get the test results with recommendations on how you can improve it.
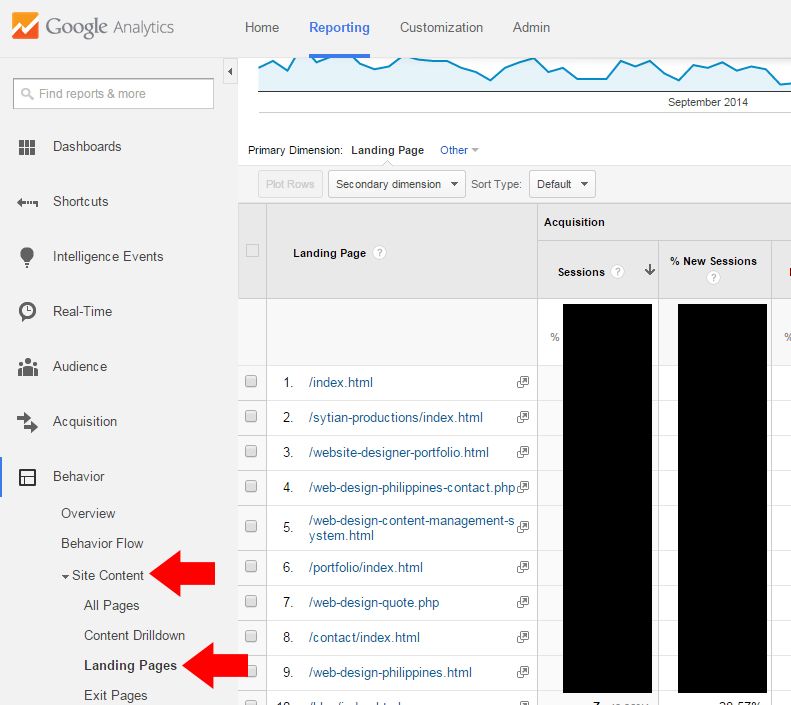
Know which ones are your top landing pages and give them much attention during your website rebuild because they are your most important pages. To see your top landing pages simply go to your Google Analytics account and navigate to Behavior > Site Content > Landing Pages. I recommend you change the date range and get the data for the past 3 months.
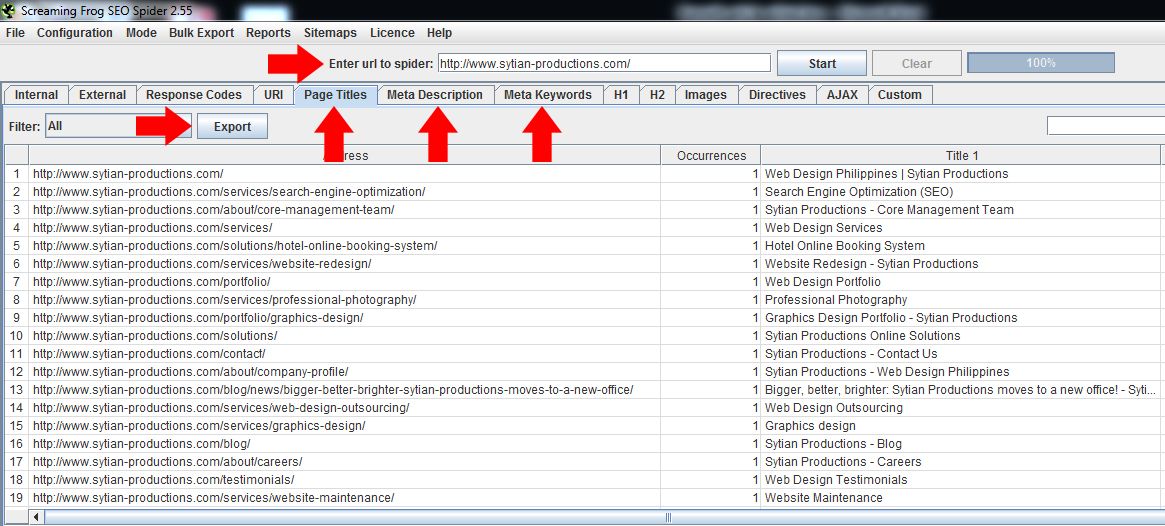
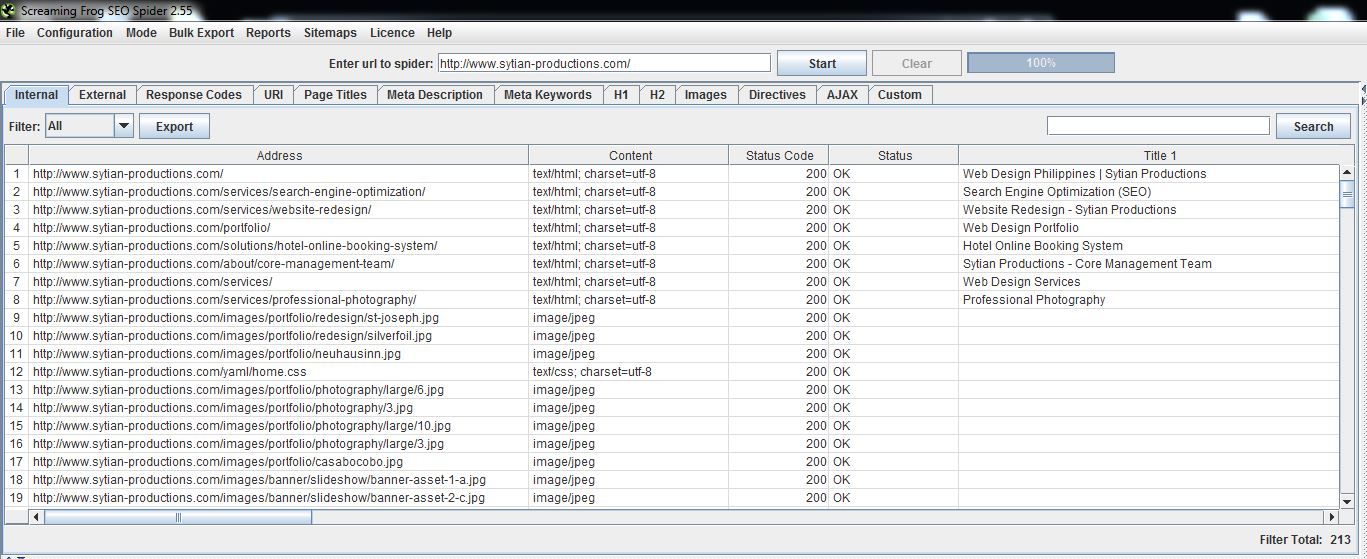
List down all the meta titles, keywords, and descriptions of your current site because you might reuse them in your new website. Screaming Frog is a very useful tool that lists down the meta data of your website. Simply download and install it, type your URL and go to the Page Title, Meta Description, and Meta Keywords tab. You can even export the result in Excel.
It is also the perfect time to re-evaluate and change your keywords strategy (if necessary) during a website rebuild. If your company added new products or services, you might want to consider adding those to your pool of keywords. You may want to ask yourself if your current keywords are still in sync with your business objectives.
*** PRO TIP : Never rebuild a website during your niche’s peak season especially if the majority of your visitors are coming from organic search.
4.) Gather incoming links to your website
If you will change domain names, restructure directories, or change URLs during your website rebuild, it is important to know the websites that are linking to your site because inbound links from them will still point to your old URLs once you launch your new website. Although, we will implement 301 redirects that tell search engines to pass the link equity of old pages to the new ones, it is best to contact the site owners and request them to update their links to the new URL. More often than not, they will be happy to update the links. You need to check for incoming links to all the pages of your website.
Here are 3 ways to trace your backlinks:
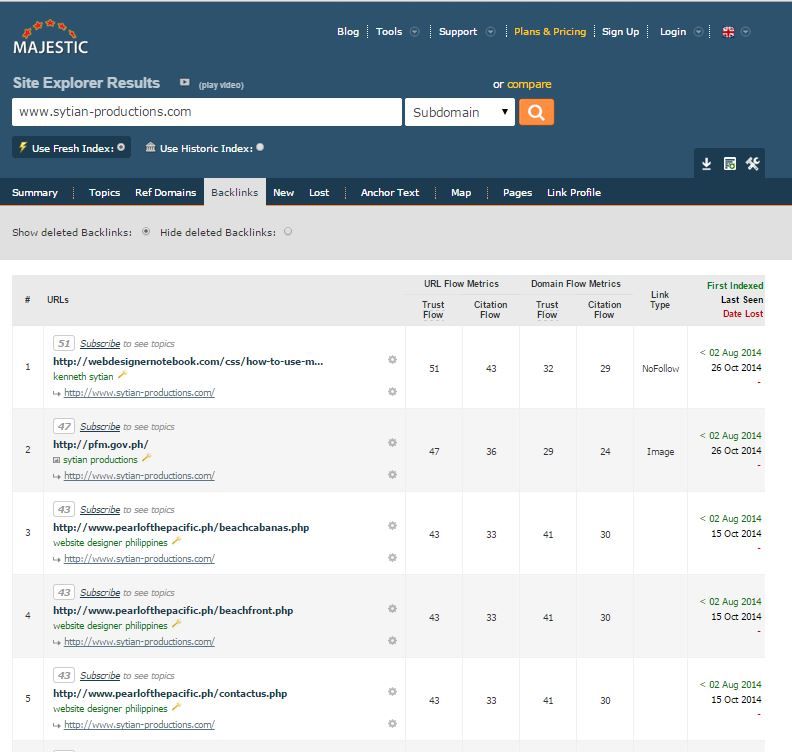
Majestic is a tool that gives a pretty comprehensive report on your own site’s backlink profile. Simply type your URL, click the Backlinks tab and then click the Download Report icon. You’ll have to sign up to be able to view the complete report.
Google Webmaster Tools allows you to see incoming links to your website on a page-by-page basis. Furthermore, it can be exported to an Excel file. Simply log in to your GWT and navigate to Search Traffic > Links to Your Site.

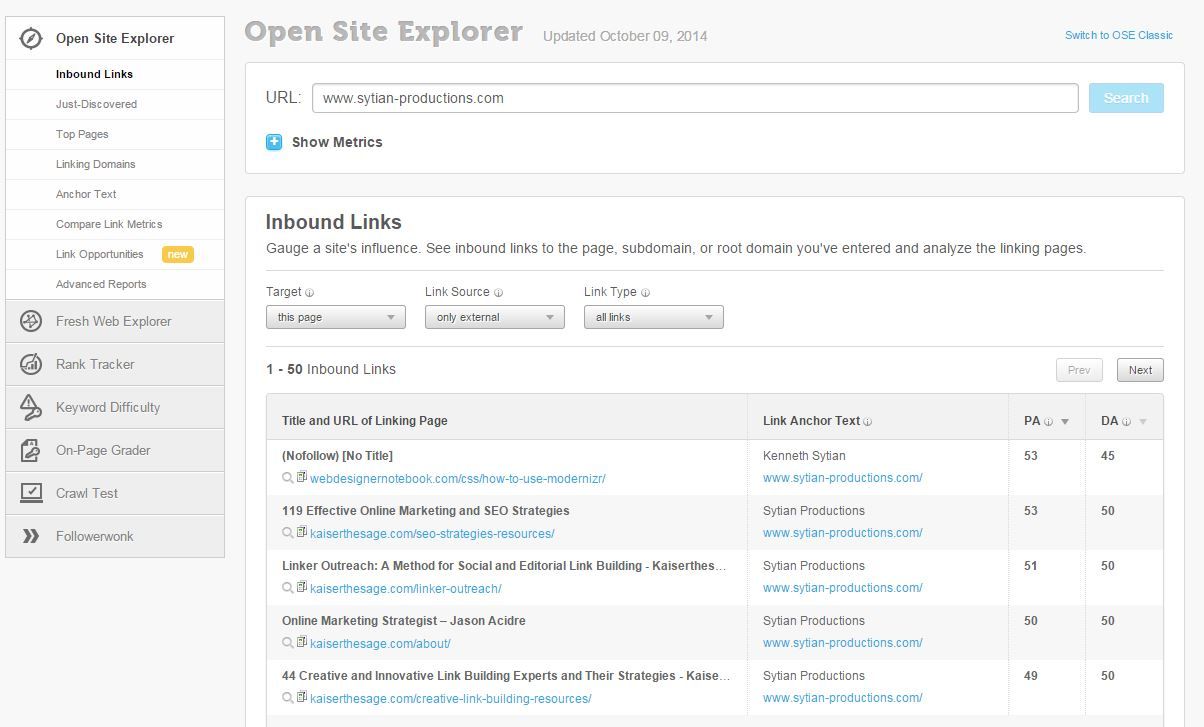
Open Site Explorer offers a 30-day trial. Their tool gives a comprehensive backlink report and the data can be exported as well. The downside is that you have to register and submit your credit card information to be able to use the full functionality of the tool.
5.) Know the performance metrics of your current website.
Before you do any tweaking on your website, it is important to get its current performance metrics because they will be used as baselines for comparison after you launch your new website. We will be able to determine if your performance worsened or improved post-launch. If your current website doesn’t have Google Analytics and Google Webmaster Tools installed, then install it ASAP and let it run for at least 2 months before you launch your new website. These are the metrics that you must gather:
Search engine rankings of your current website. This is one of the most important factors that you must monitor before and after a website rebuild. There are several tools that you can use to get your current rankings. Here are just a few:
Rank Checker by SEObook.com. Rank Checker is a Firefox Add-On that you can download from SeoBook.com (you have to register before you can download it). The good thing about this tool is you can input multiple keywords at the same time and the results can be exported to Excel. Plus, it’s free. The downside is it only gives results for Google, Yahoo, and Bing.
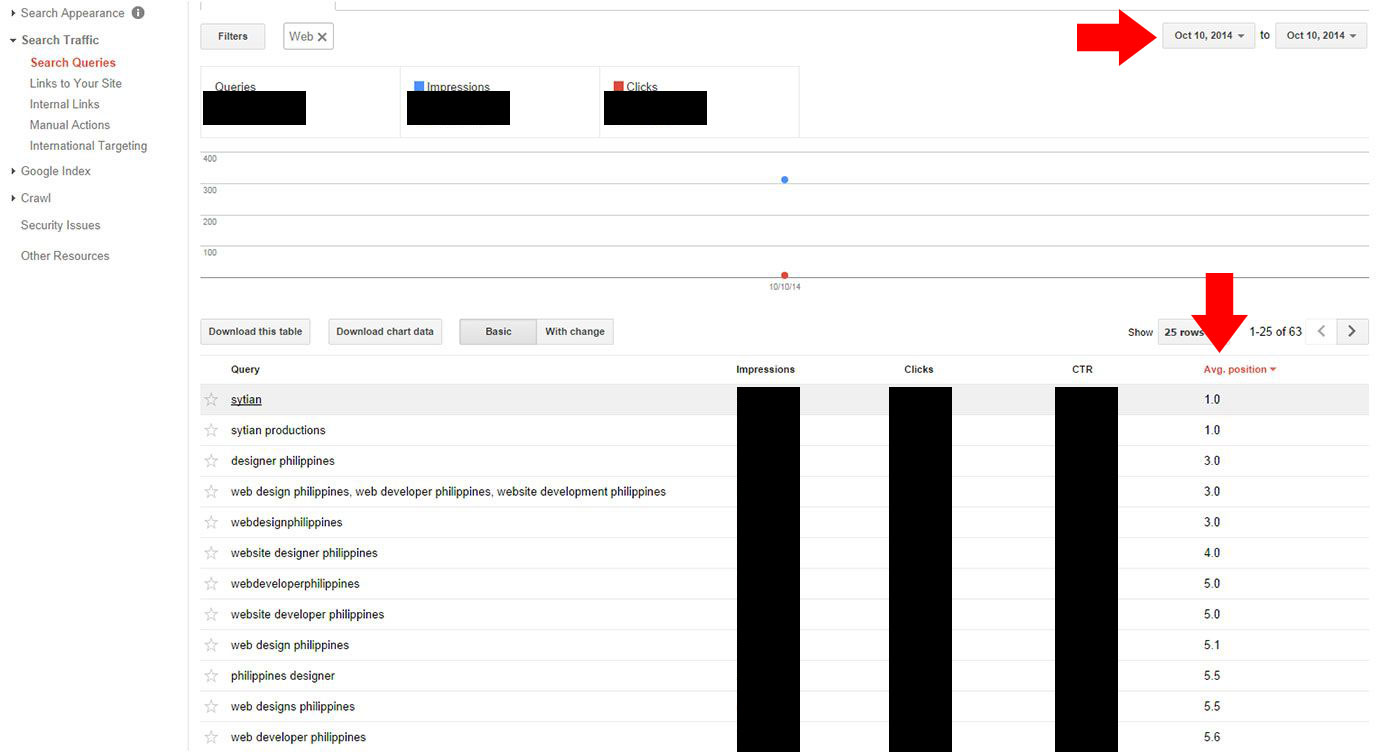
Google Webmaster Tools (GWT). You can also monitor your average keywords position via GWT. Simply log in to your GWT account and navigate to Search Traffic > Search Queries and make sure you only select a single date. You don’t want to track your average SERP ranking for multiple days because it will be inaccurate for our purpose of comparison. You can then save the data by clicking the “Download this Table” button.
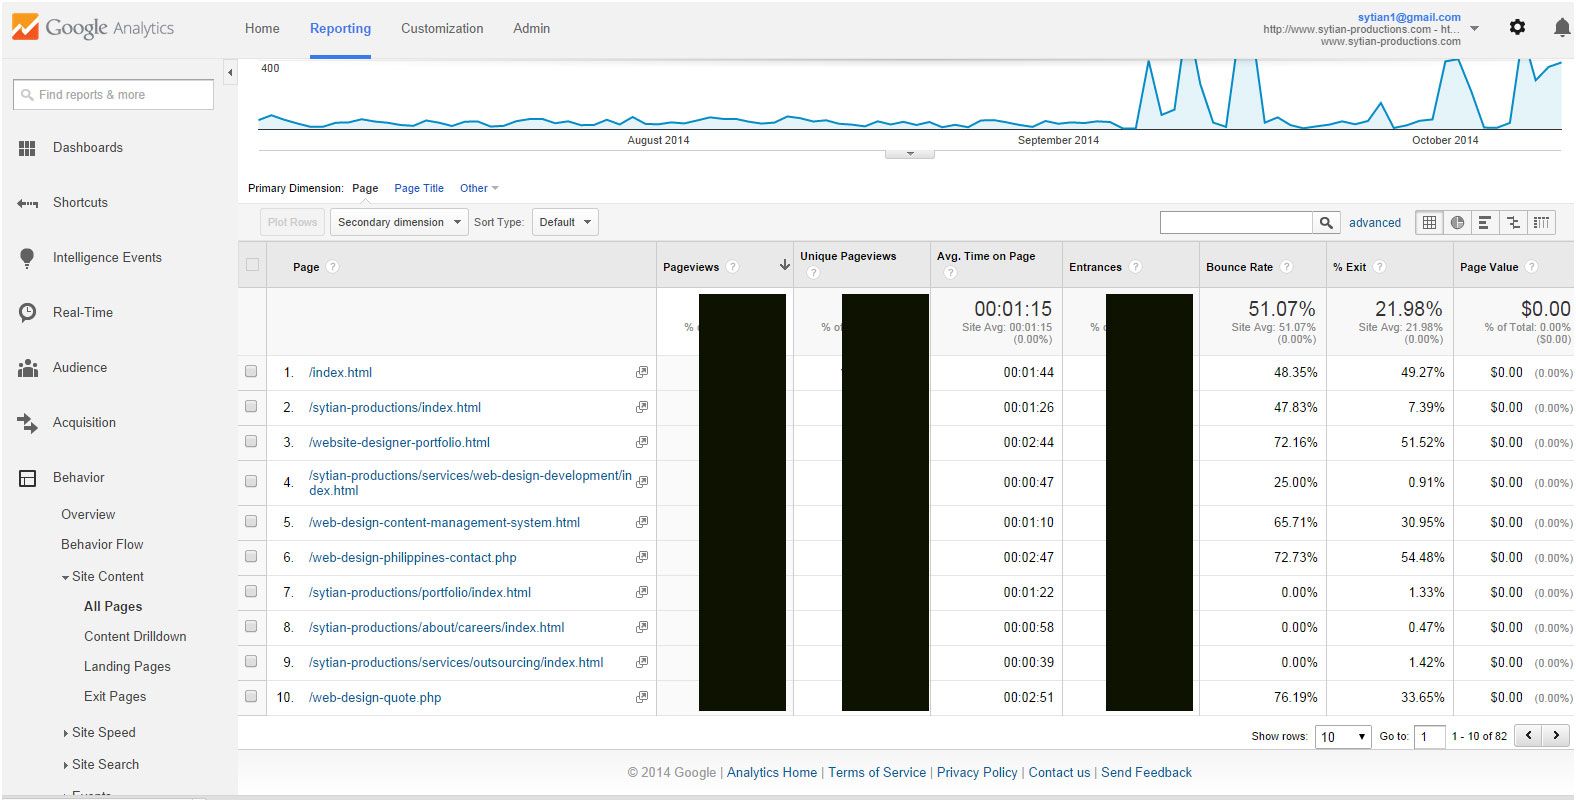
Know your Usage Data. It is important to know your current website’s bounce rate, page views, average time on site, etc. You would want these numbers to improve after the rebuild. If it becomes worse, then you know you have some tweaking to do on your new website. I recommend getting at least 2 months of data. To get this, simply log in to your Google Analytics account and navigate to Behavior > Site Content > All Pages. Then, change the dates to the last 2 months. Lastly, click Export to save the data. Do the same at Conversion > Goals > Overview.
6.) Use a staging site.
When you create a new website, you first develop it locally using your computer. Once you complete the website and you are satisfied with how it turned out, you then upload it from localhost to the live server. There is one problem with this approach, though: what if the website is working perfectly in your localhost but does not work on the live server? This can result in some downtime for your website and it can affect your search engine ranking performance.
I recommend that instead of uploading the new website immediately to the live server, you must upload it first to a staging environment on the same server. A staging site is a clone of your new website that is placed in a separate area on your site for testing purposes. It is usually placed in a subdomain (newsite.yourdomain.com) or on a subfolder (yourdomain.com/newsite/). Once you have thoroughly tested the site and are sure that everything is working, that’s the time you upload it to your live site.

7.) Disable spiders from crawling your staging site.
If you are using an online staging site during the development phase make sure you disable search engine spiders from crawling it to prevent your staging site from being indexed by search engines. I’m sure you don’t want visitors to see an incomplete website. Even worse, you don’t want to have duplicate content issues.
There are tons of ways to do this. Here are just a few:
Via robots.txt. A robots.txt file is a text document that you upload in the root directory of your online staging site which contains instructions to search engine spiders not to crawl parts of your website or your entire website for that matter.
Since we don’t want the bots to crawl our entire staging site, the robots.txt file must contain these lines:
User-agent: *
Disallow: /
The * means you are instructing all crawlers. “Disallow” means you are telling them not to crawl and / means you are targeting all files and folders within your site.
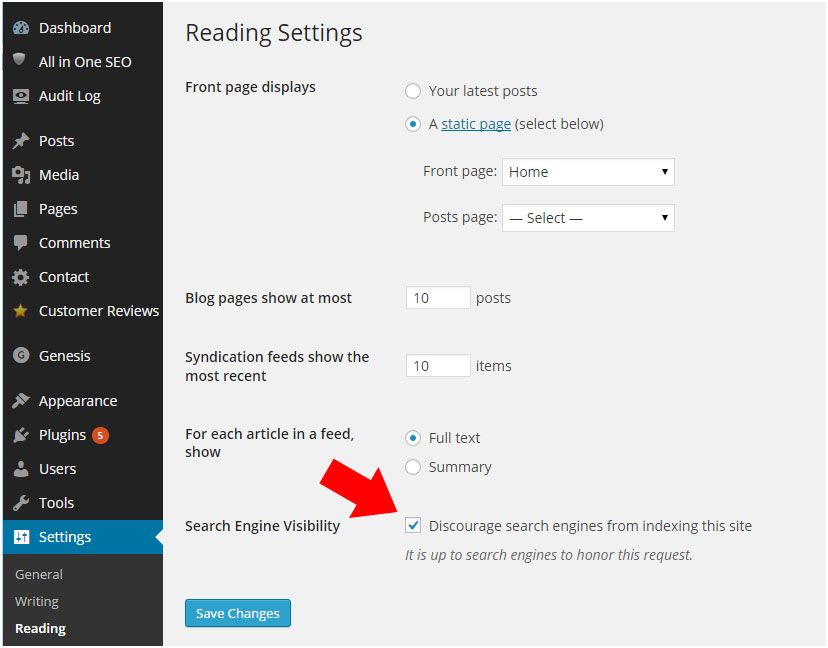
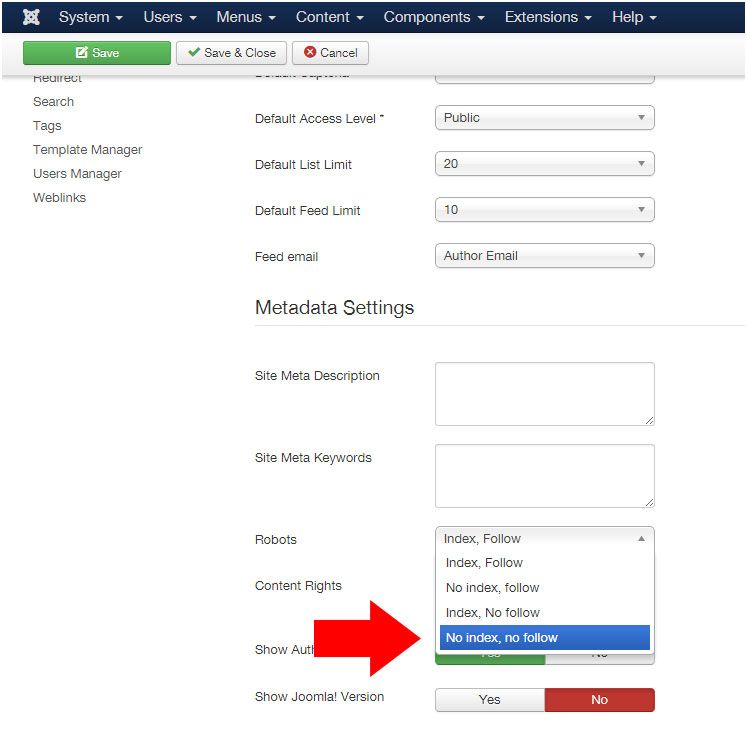
CMS Settings. If you are using WordPress, simply log in to WP-Admin and navigate to Settings > Reading and put a checkmark at “Discourage search engines from indexing this site” then save the changes. If you are using Joomla, simply log in to the administrator panel and navigate to the Global Configuration. At the bottom of the page, you will see Metadata Settings. Simply select “No index, no follow” at the Robots drop down menu and click save.
Meta tags. In all of your pages you may add <meta name=”robots” content=”noindex”> between the <head> </head> tag of your HTML markup. If you have hundreds of pages putting this code in all of the pages one by one would be a hassle. One workaround is you can add it as a PHP include or, if you are using ASP.net, you may add it in a Master Page that is used in all of the pages of your site.
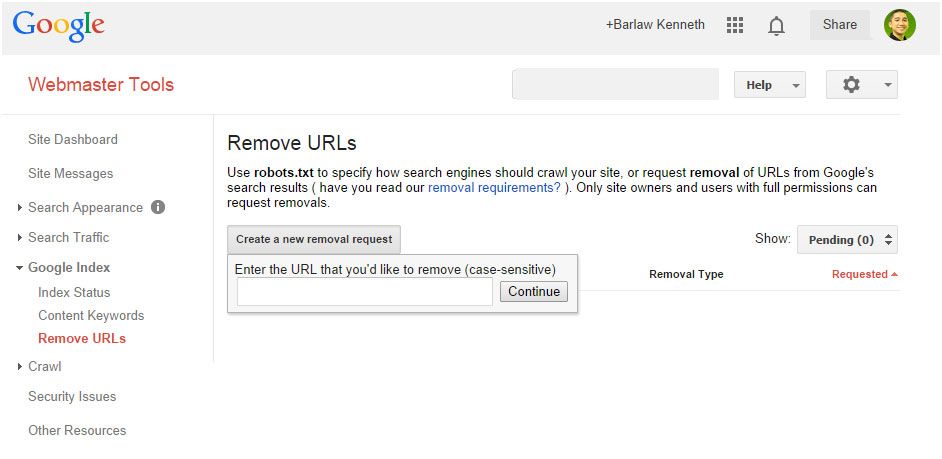
Google Webmaster Tools. Log in to your GWT account and navigate to Google Index > Remove URLs and click “Create a new removal request.” When you see the text field prompt, type the location or folder of your online staging site, then click Continue and Submit Request.
.htaccess. You can also prevent bots from crawling your site by uploading a .htaccess file in the root directory of your staging site. Put these lines of code in the .htaccess file and upload it via FTP or FileManager.
Options +FollowSymLinks -MultiViews
RewriteEngine On
RewriteBase /

RewriteCond %{HTTP_USER_AGENT} (googlebot|bingbot|msnbot|yahoo! slurp|baiduspider) [NC]
RewriteRule .* - [L,F,NC]
This will only work if you are hosted on an Apache web server which probably constitutes to the majority of websites in the internet. If you are using a Linux-based server, chances are it is running Apache. But take note that one small typo error in .htaccess could mess up your entire website. So, I suggest you use .htaccess as a last resort.
8.) Come up with a 301 Redirect Strategy.
If you change domain names (from yourdomain.com to newdomain.com), directory structures (from yourdomain.com/articles/ to yourdomain.com/blog/) or URL slugs (from yourdomain.com/about-us.html to yourdomain.com/about.html) this is perhaps the most important step that you should not miss when rebuilding a website. From a search engine’s perspective, 301 redirects instruct them to transfer link authority from the old URL to the new one. If you don’t have 301 redirects, the new URLs would have to start from scratch in terms of ranking which could mean a decrease in traffic and ultimately, a decline in sales.
The first step is to list down all of the pages of your current website in an Excel file. Here are simple ways to do it.
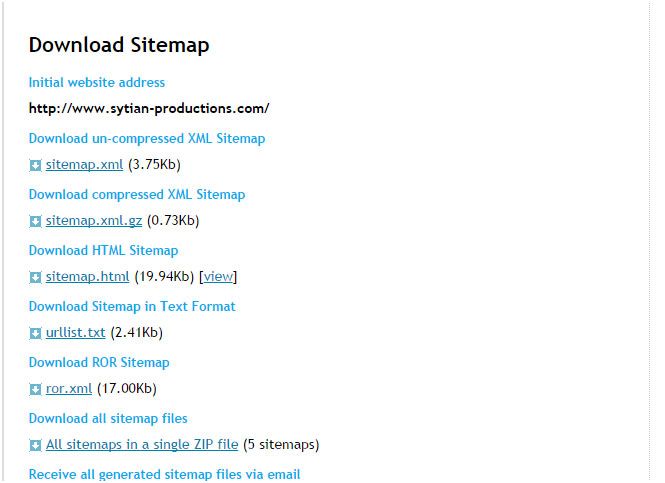
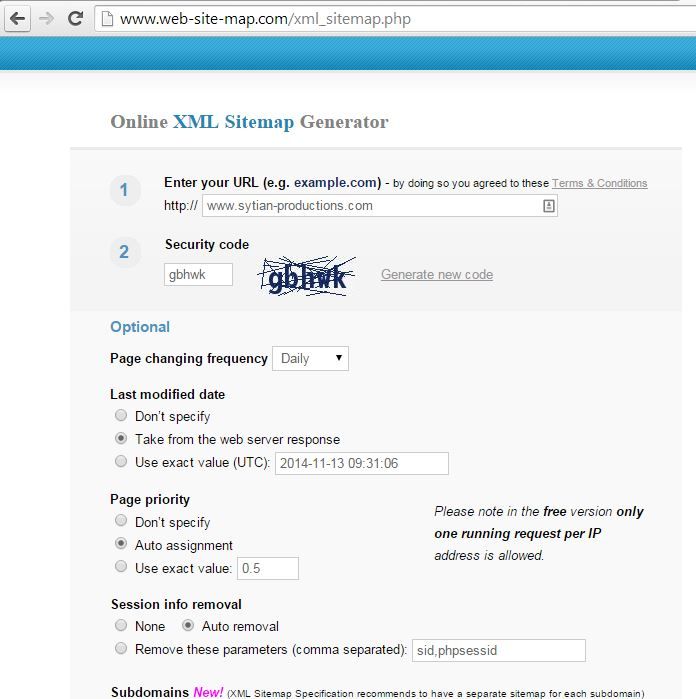
Sitemap generator sites. Websites like XML Sitemaps and XML Sitemap Generator can generate the sitemap of your current site by simply typing your website URL. Just click start, then download the sitemap. Open it using any text editor and copy the generated pages and paste it in Excel.
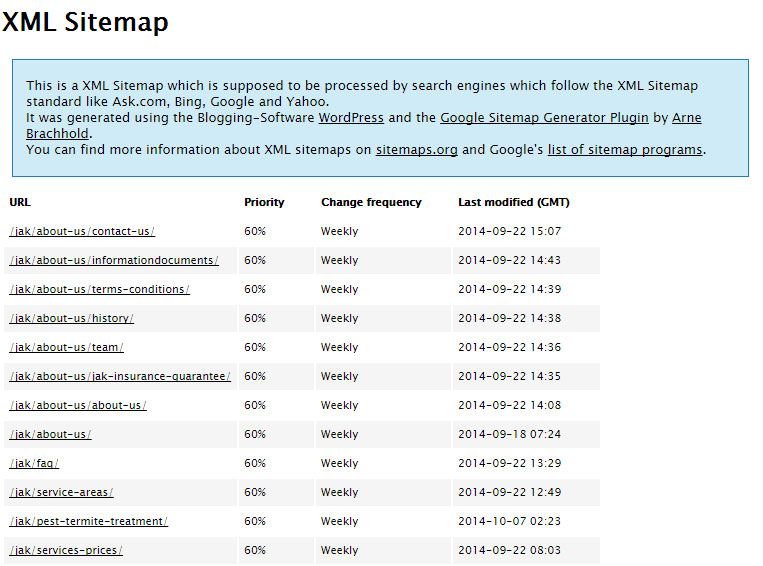
If you are using a CMS, you can install a sitemap generator plugin. If you are using WordPress, simply install Google XML Sitemaps and paste the generated pages in Excel.
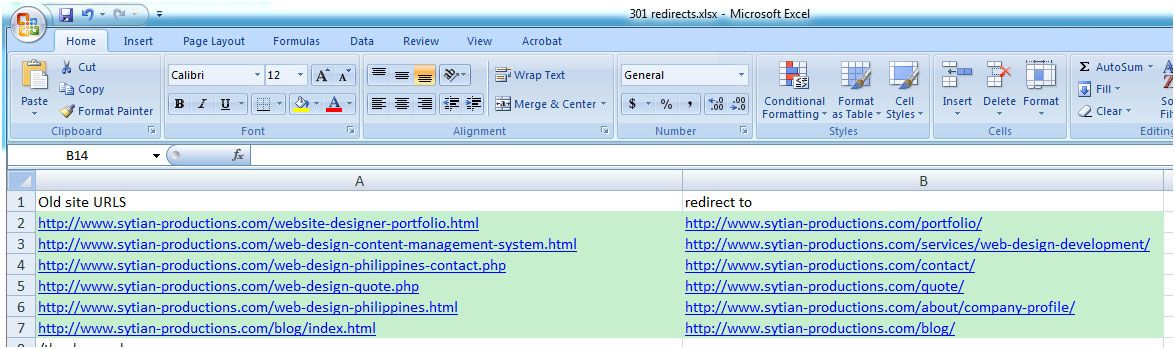
Once you have the complete list of your current website’s pages in Excel, write down the corresponding new URL in the opposite column. This is how the final Excel file should look like.
*** PRO TIP : As much as possible try to retain the same domain and URL structure as your original website when rebuilding. But if it is inevitable due to migration to a different CMS, a better domain name, or company rebrand, make sure you come up with a solid 301 redirect strategy.
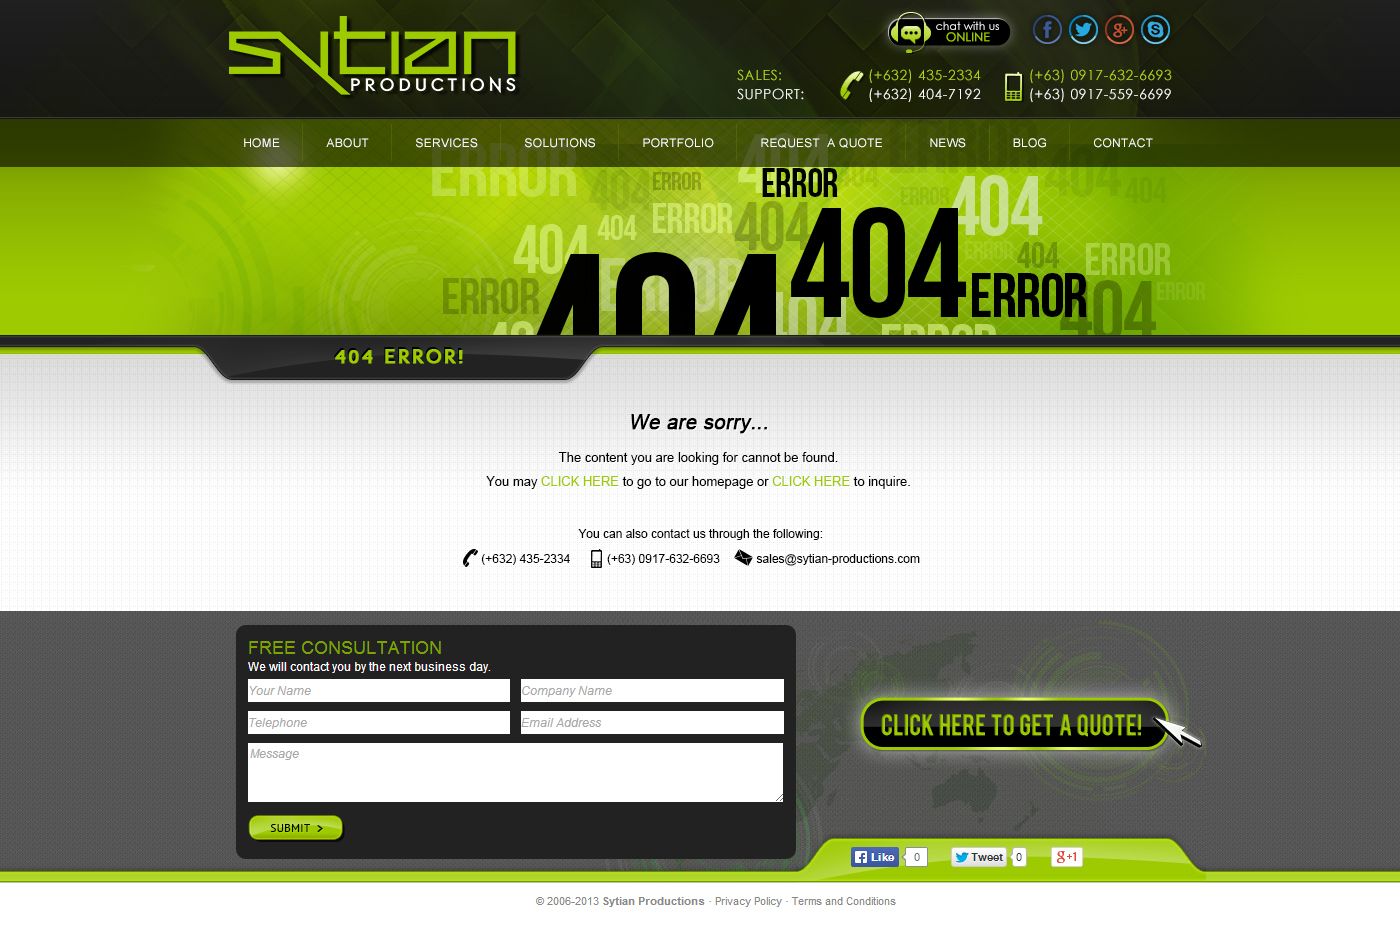
9.) Create a 404 error page.
A user gets a 404 server response or a Page Not Found error message when he goes to a page on your site that doesn’t exist because it has been deleted or has been moved to a new location. Creating a 404 error landing page is a must for all websites especially if it undergoes a rebuild. Ideally, you would want to 301 redirect old pages to the new ones but just in case you missed any or if the visitor has bookmarked an old web page or clicked a backlink that is still pointing to an old page, you would want to inform him that it has been moved or deleted. A well-designed 404 page will have the company’s name and logo, a navigation menu so the user can go to other parts of your website, the company’s contact information, the reason why the visitor is seeing a 404 page and if applicable, a search box that customers can use to find the right page they are looking for.
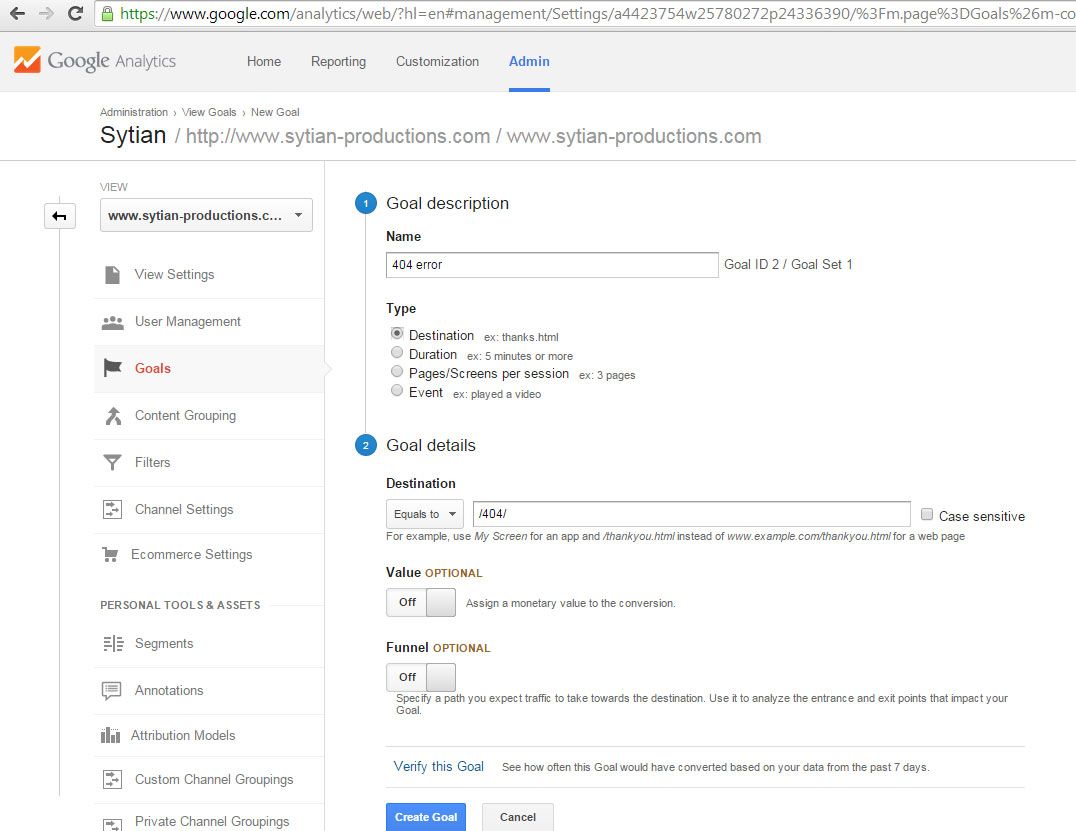
*** PRO TIP : You can set the 404 page as a Goal in Google Analytics and by doing so you can track which pages they visited before they landed in the 404 page. This will make it easier for you to find pages within your site with broken links. To do this simply login to your GA accounts and navigate to Admin > Goals > New Goal.
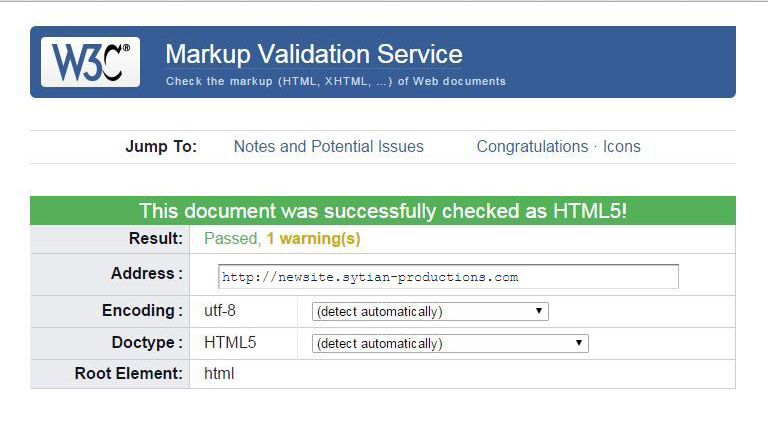
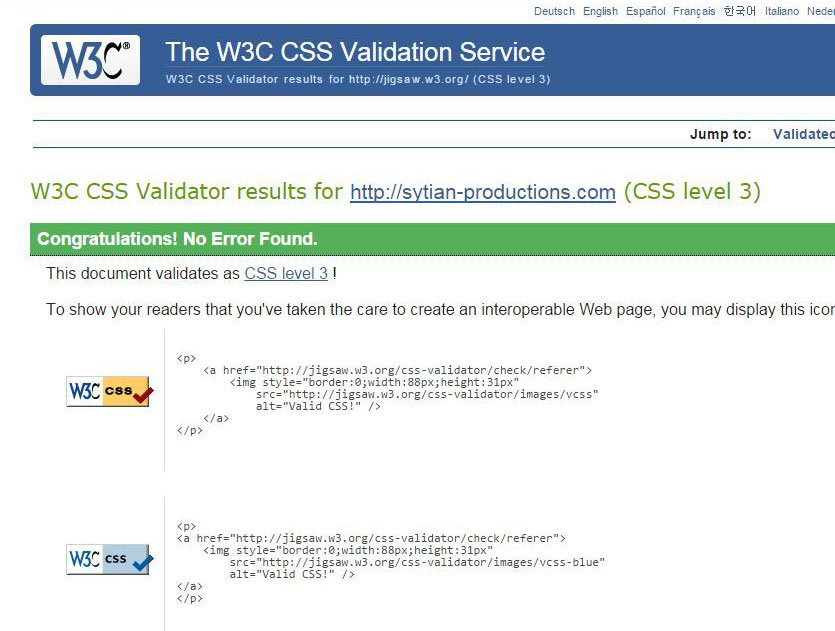
10.) Make sure your new website’s HTML and CSS markups are valid.
Make sure your new website doesn’t have any coding errors. To validate your HTML/XHTML code go to http://validator.w3.org/ and check all the pages of your website. If your website has thousands of pages make sure you check at least all the major pages or all template pages. To check for the validity of your CSS code go to http://jigsaw.w3.org/css-validator/. Preferably, you don’t want to get any errors or warnings. Common errors include missing alt tags on images, forgetting to close an element, starting classes and IDs with a number, and improper nesting of elements which may be caused by mistakes in your coding or by a plugin you installed.
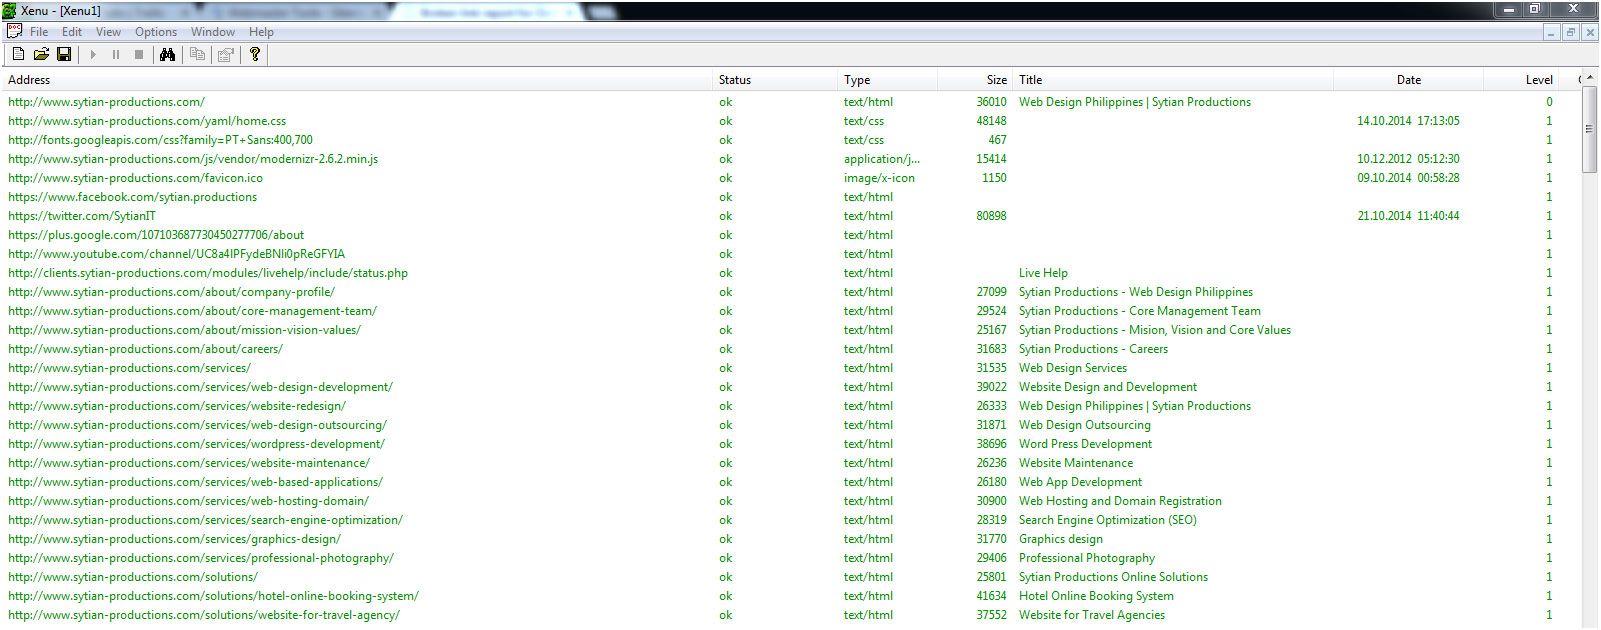
11.) Look for broken links and other on-site errors.
Xenu Link Sleuth. Xenu is a free desktop application. Once you install it, simply click on File > Check URL and type your staging site’s URL. Make sure you put a checkmark at “Check external links”. Then, click OK and you will get a generated report. Ideally, you will want a green OK status for all the items. Common errors that you will see include broken links, redirected URLS and orphan files.
Screaming Frog is also a great tool to look for broken links and other errors in your website. It’s an application that you download and install as well. You simply type the URL of your staging site and Screaming Frog will generate a report for you. The report will let you know if you have any client or server side errors, broken links, missing meta title, keyword and description tags, missing H1 and H2 tags, and many more. The downside of this application is that it only allows crawling a maximum of 500 URIs and you won’t be able to change the configuration options. If you want to get the full functionality you have to purchase a license.
12.) Compare on-page performance of the old website vs. the new website.
In my opinion, building a solid on-page SEO foundation is just as important as off-page optimization. Getting good scores for load time, number of requests and page size will affect not only your search engine rankings but also the user experience. No one wants to browse a slow-loading website. If you rebuild your website, you’ll want to make sure the on-page performance is better than your old site.
You can use these 3 tools to check your on-page performance.
Pingdom Website Speed Test
PageSpeed Insights
GTmetrix
At the bottom of each test, there are recommendations that you can implement to improve your scores. Common culprits for slow page speed are tons of images on the page, not optimizing images, slow servers, un-minified resources, not using image sprites, and not leveraging browser caching.

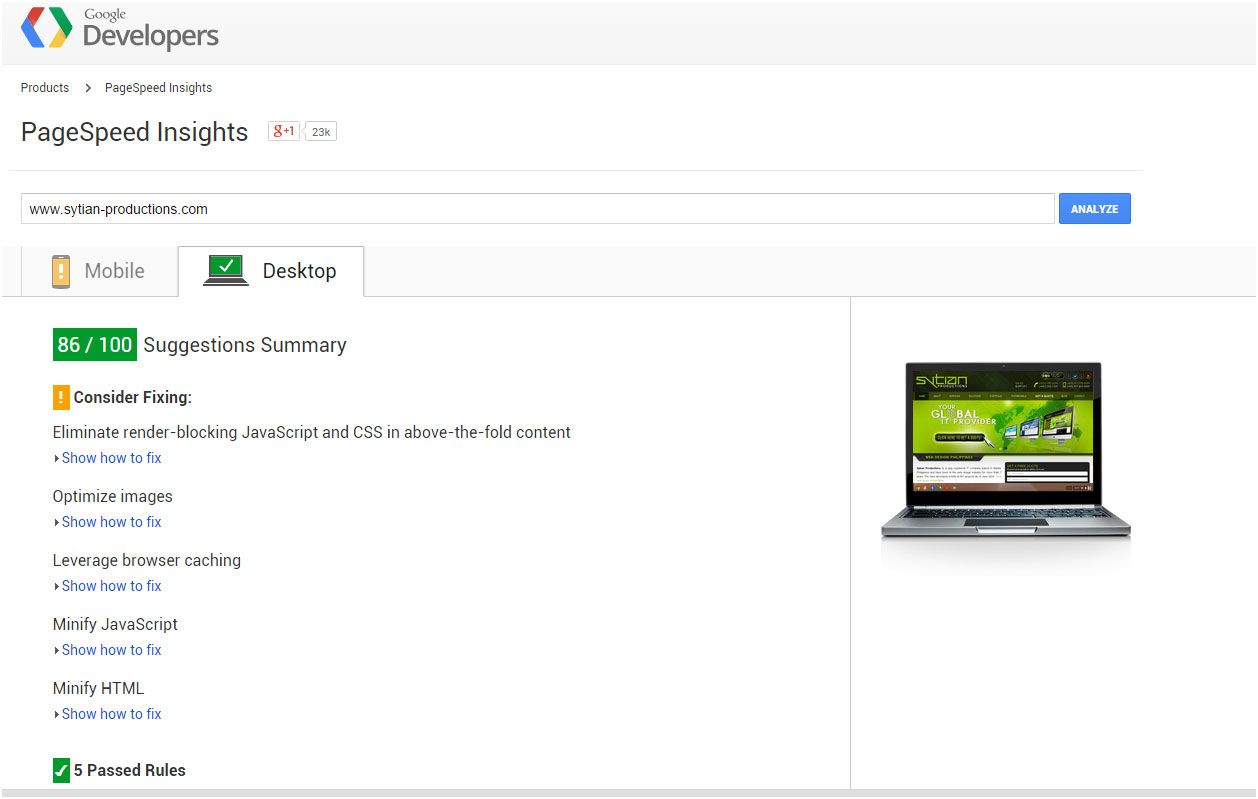
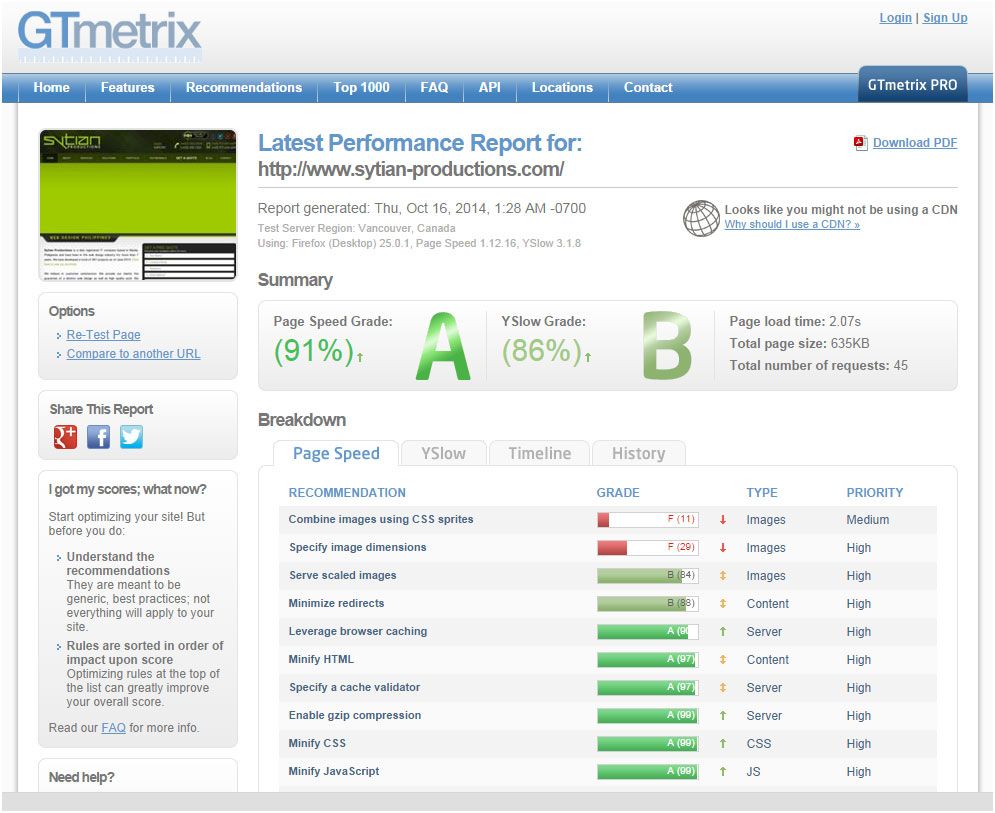
*** PRO TIP – Ideally, you would want a grade of at least 80 and above, page requests that is less than 70, load time less than 2 seconds and page size of less than 1MB. You can only use these tools if you have an online staging site. These tools won’t be able to check your site if you developed it locally.
13.) Check for duplicate content.
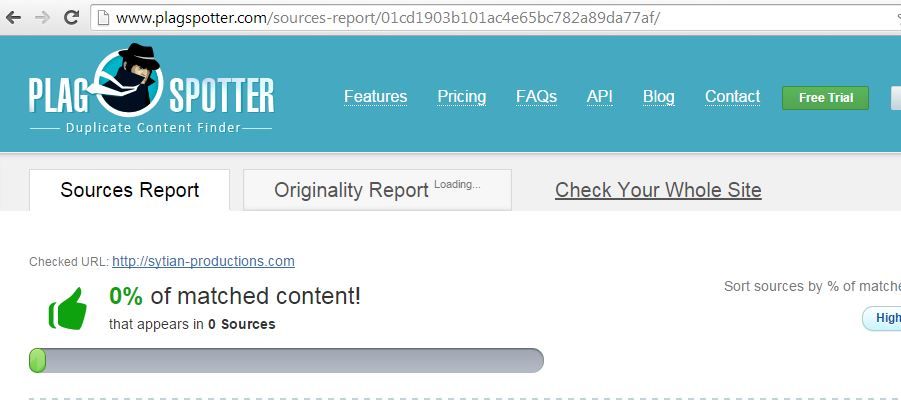
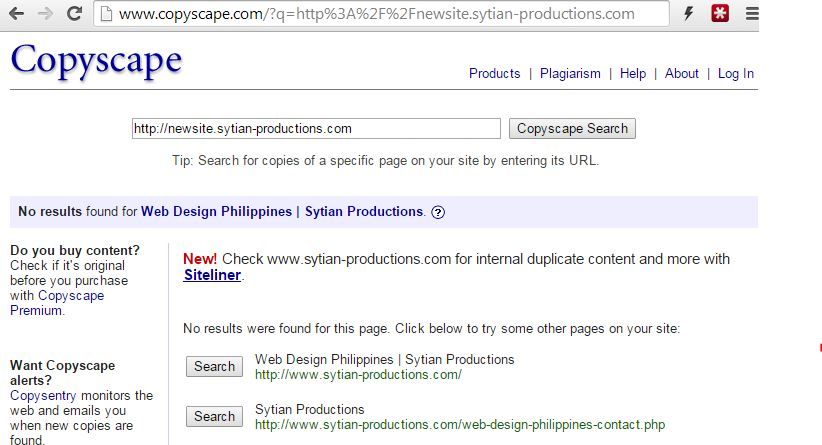
Content is considered duplicate if it appears in more than one URL. If you are not the one who wrote the content of the new website, make sure you check if it has duplicates inside and outside of your domain. Search engines don’t like sites with duplicate content and your listings could get filtered out if they are deemed to be copies of other pages.
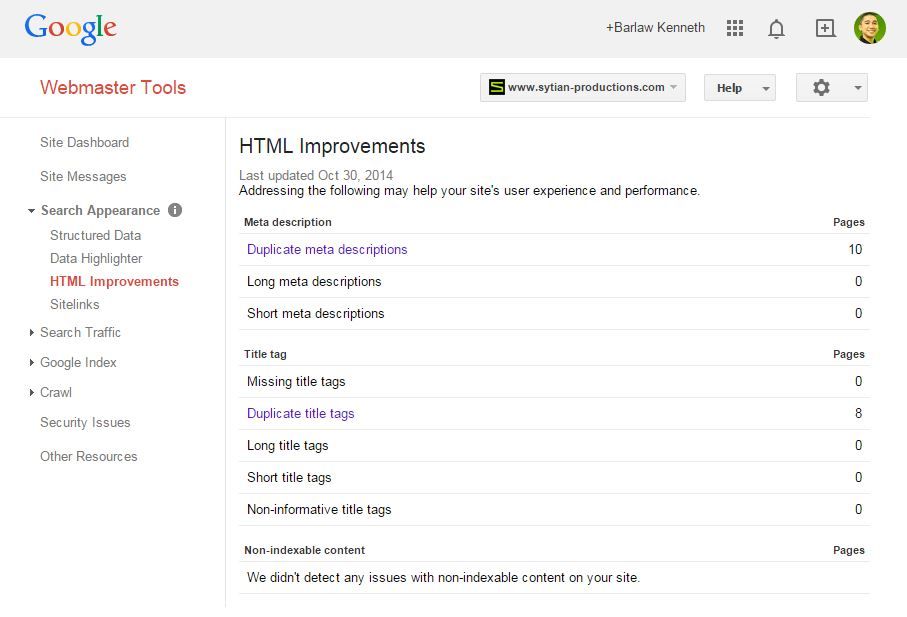
You may use Copyscape or PlagSpotter to check for duplicate content. If you do find duplicates, make sure you return the article to the copywriter and ask him to rewrite it. You can also check duplicate content within your website via GWT. Simply login and navigate to Search Appearance > HTML Improvements
*** PRO TIP : read more about duplicate content and how you can address it at http://moz.com/learn/seo/duplicate-content and http://moz.com/blog/fat-pandas-and-thin-content
14.) Changing web hosting providers.
There are instances when you need to change servers during a redesign due to scripting language or database of the new website not being supported by the current server, bandwidth and disk space limitations, or pricing concerns. As long as your domain name remains the same, moving to a new web host or changing to a different IP address will not have a big impact in your SERP ranking because your hosting has nothing to do with the quality and relevancy of your website’s content. Just make sure you try to minimize or completely avoid the downtime during migration.
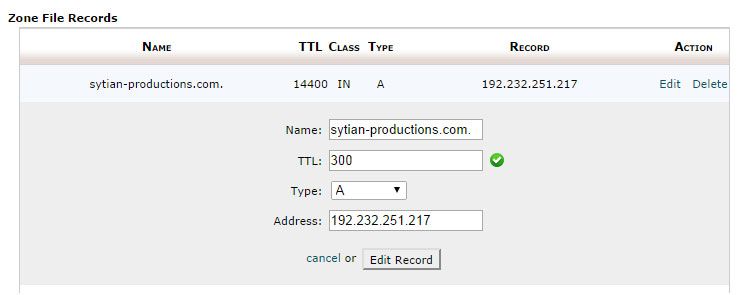
*** PRO TIP : 1 day before you switch servers, make sure to set the TTL (Time To Live) on your DNS records to 5 minutes (300 seconds) to minimize the propagation period of the migration. The default settings for TTL is usually 12 or 24 hours. This means that if you point the IP to the new server, it will take 12 or 24 hours before it propagates. Setting the DNS to 5 minutes means it will only take 5 minutes to switch to the new server. If you are using cPanel, go to Advanced DNS Zone Editor and edit the Zone File Records. Put 300 in the TTL field. Make sure you already uploaded the new website to the new server before you change the DNS. It’s good to leave the content live on both servers for a few days just so you can revert back to your old server in case something odd happens.
Post-launch
This phase covers from uploading to the actual live server/domain and onwards. Most of the tasks that you do on this phase are all about making sure that your website doesn’t have any errors and comparing the performance metrics of the old website to the new one.
15.) Allow spiders to crawl your site.
The first thing that you should do post-launch is to allow spiders to crawl your site. During our pre-launch phase, we disabled search engine spiders from crawling our incomplete website. But now that your website is complete and live, you‘ll want to enable search engines to crawl your site. Simply delete the meta noindex tag we placed in the <head> of the pages, delete the codes we placed in the robots.txt or .htaccess files in our pre-launch phase, and/or enable crawler access via your CMS settings.
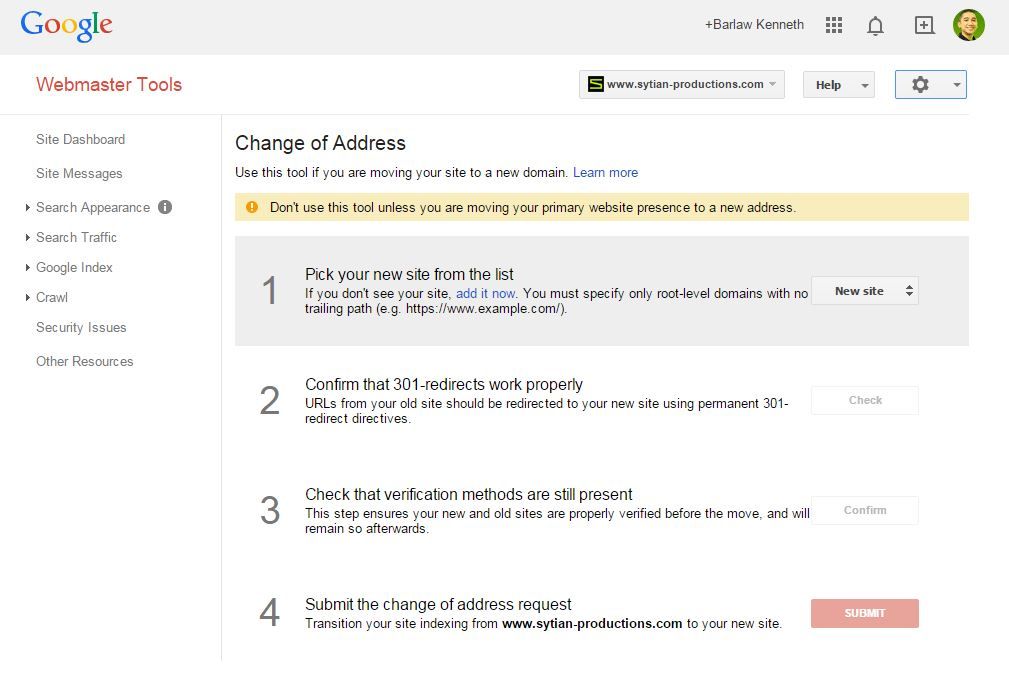
16.) Tell Google you changed domain.
If you are moving to a different domain, you have to let Google know about it via Google Webmaster Tools to avoid conflicts and to minimize the impact on your rankings in the SERPs. After you verify ownership of the new domain, log in to your GWT account and click the gear icon located on the upper right part of the page and select Change of Address.
Read more about Google’s Change of Address tool.
17.) Transfer Google Analytics tag and Set Goals.
Once you launch your new website, make sure you transfer your current GA tag to the HTML code of the new website so you can continue to track your website statistics. Furthermore, if you have edited or added new functionalities in your new website such as newsletter subscription/opt-in forms, comments, registration forms, inquiry forms, file downloads, etc., it is important that you track their conversion by editing your existing goal settings or adding new goals. Log in to your Google Analytics account and navigate to Admin > Goals, then edit or add the necessary goals. By setting goals and measuring conversions, you will be able to improve your campaigns by determining which ads, keywords, promotional campaigns, or design touches convert the best.

*** PRO TIP : Google Analytics doesn’t allow you to delete existing goals. You can only either edit or deactivate them.
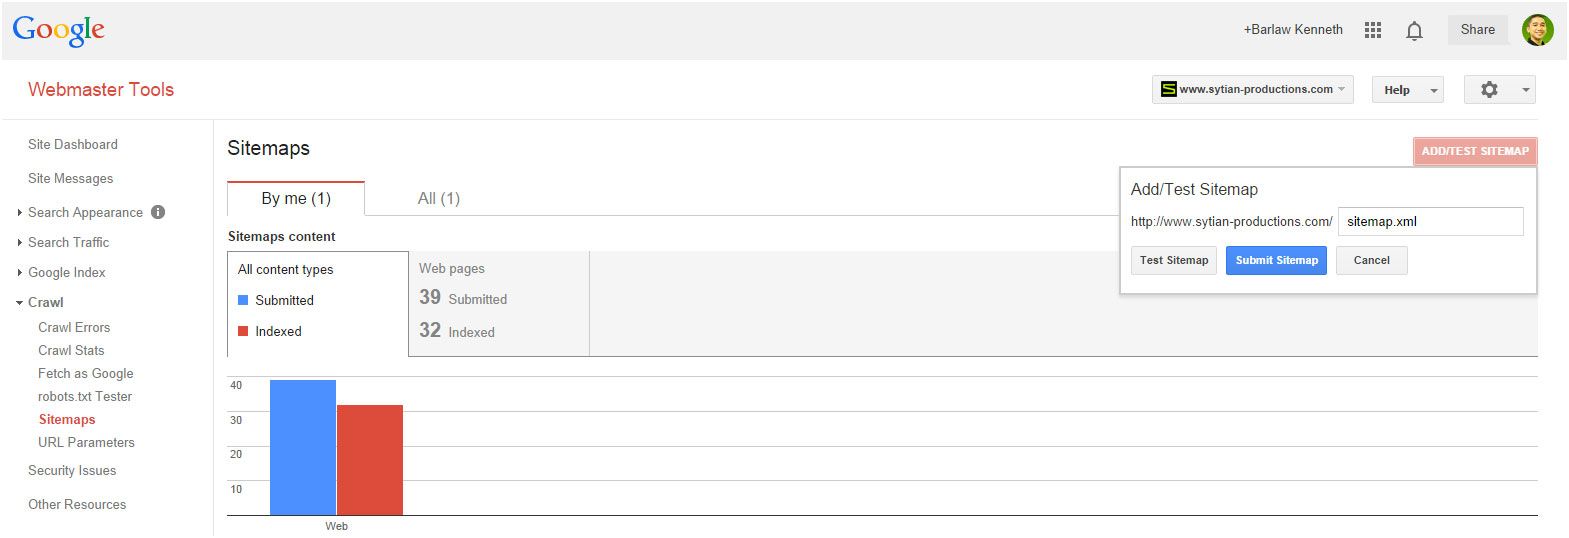
18.) Submit new sitemap to search engines.
You must generate a new sitemap by following the steps in our pre-launch phase, then save it as “sitemap.xml”. Next, upload it at the root directory of your site (http://www.yourdomain.com/sitemap.xml). Then, upload the new sitemap at Google Webmaster Tools by logging in at your GWT account and navigating to Crawl > Sitemaps and click Add/Test Sitemap and type the filename of your sitemap and click Submit Sitemap.
Once uploaded, you have to constantly visit the GWT Sitemaps page and monitor if the new pages have been indexed. It usually takes a few days before new pages gets crawled by Google. It’s perfectly normal that not all your pages are indexed by Google. But if the majority of your pages are not indexed, you may want to read Best Practices to Help Google Find, Crawl and Index Your Site.
*** PRO TIP : Once you upload your new sitemap, you can use Ping Sitemap to help further the crawls and hasten the indexation of your new pages. Simply type your sitemap’s URL and hit submit.

19.) Implementing 301 redirects
Since you already have the redirect plan mapped out during the pre-launch phase. It’s now time to implement it. There are several ways to implement 301 redirects. Here are just a few:
Via .htaccess. An .htaccess file is a configuration file that is only applicable if you are using an Apache Web Server. You typically upload the .htaccess file in the root folder of your site. The pattern of the code will be like this:
RewriteEngine On
Redirect 301 /OldUrl.html http://www.yourdomain.com/NewUrl.html

This is a portion of the actual 301 redirect of our website:
RewriteEngine On
Redirect 301 /website-designer-portfolio.html http://www.sytian-productions.com/portfolio/
Redirect 301 /web-design.html http://www.sytian-productions.com/services/web-design-development/
Redirect 301 /web-design-philippines-contact.php http://www.sytian-productions.com/contact/
This type of 301 redirect is only appropriate if you only have a few pages. But if you have hundreds or thousands of pages, you can use regex to redirect the pages.
Via web.config. The web.config file is ASP.net’s equivalent of .htaccess because it sets the configuration of the entire website. The pattern of the code for a 301 redirect will be like this:
<rewrite>
<rules>
<rule name="any name here">
<match url="OldUrl.html" />
<action type="Redirect" url="NewUrl.html" redirectType="Permanent" />
</rule>
</rewrite>
If I were to code a part of the 301 redirect of our website in ASP.net, it would look like this:
<rewrite>
<rules>
<rule name="portfolio">
<match url="/website-designer-portfolio.html" />
<action type="Redirect" url="http://www.sytian-productions.com/portfolio/" redirectType="Permanent" />
</rule>
<rule name="web design">
<match url="/web-design.html" />
<action type="Redirect" url="http://www.sytian-productions.com/services/web-design-development/" redirectType="Permanent" />
</rule>
</rules>
</rewrite>
The rewrite rules are stored in the <system.webServer> section of your web.config. Again, this is only applicable if you will redirect a few pages. But if you will be redirecting hundreds or thousands of pages you might want to use regex. You can read more about regex applied in web.config.
*** PRO TIP : For both .htaccess and web.config, you have to be exact if you will use either www.yourdomain.com or yourdomain.com (without the www)
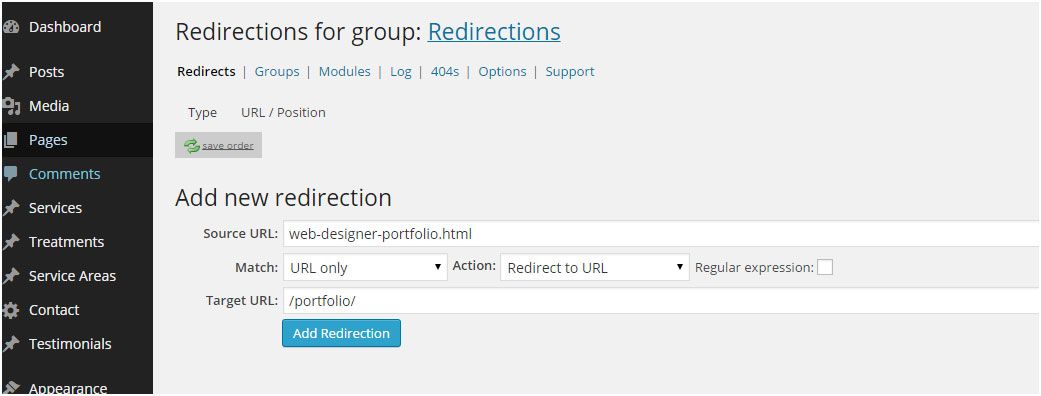
Via CMS Plugin. If you are using WordPress, you can simply install and activate a 301 Redirection plugin such as Redirection. After activating the plugin, go to Tools > Redirection and create the rules. You can use regex as well in this plugin.
Once you have added the 301 redirects, be sure you test them out by visiting the old URL and making sure you are redirected properly to the new URL.
20.) Double check the functionality of all the pages and proofread content.
It is a must that you visit each of the pages of your new website and check the following:
- grammatical and typo errors
- a hrefs are linking to the correct pages (especially the main navigation menu)
- inquiry, login, registration, and newsletter opt-in forms are executing the correct actions
- validate that all the social media buttons are working
- blog comments are functioning
- if you have an ecommerce website make sure the cart and payment functionalities are all working (if need be, try an actual transaction)
- lightboxes and animations are working
- videos are embedded correctly and are playing smoothly
- images are loading properly
There are times where you will see errors on the live website due to the differences in configuration from the development server and actual server, mistakes in the settings of the CMS and config files, or forgetting to upload certain files, or the files getting corrupted during migration.

21.) Inform site owners that you have changed URLs.
During our pre-launch phase, we gathered different sites that are linking to the different pages of our website. Once you launch your new website, you now have to contact the administrators of each of these sites and inform them that you redesigned your website and you changed your URL structure. You have to let them know which page of their website is linking to yours and let them know your new URL and request them to update their links. In case they don’t change the URL, your 301 redirect will forward the visitors to the new URLs. However, it is best to try and point all the inbound links to the new URL.
*** PRO TIP : Contacting the site owners of the website linking to you is also a good way for you to establish or re-establish your relationship with them. You can also build high quality links by tracking your competitor’s backlinks and turning them into link opportunity by identifying which of their link(s) is broken – here’s how broken link building works.
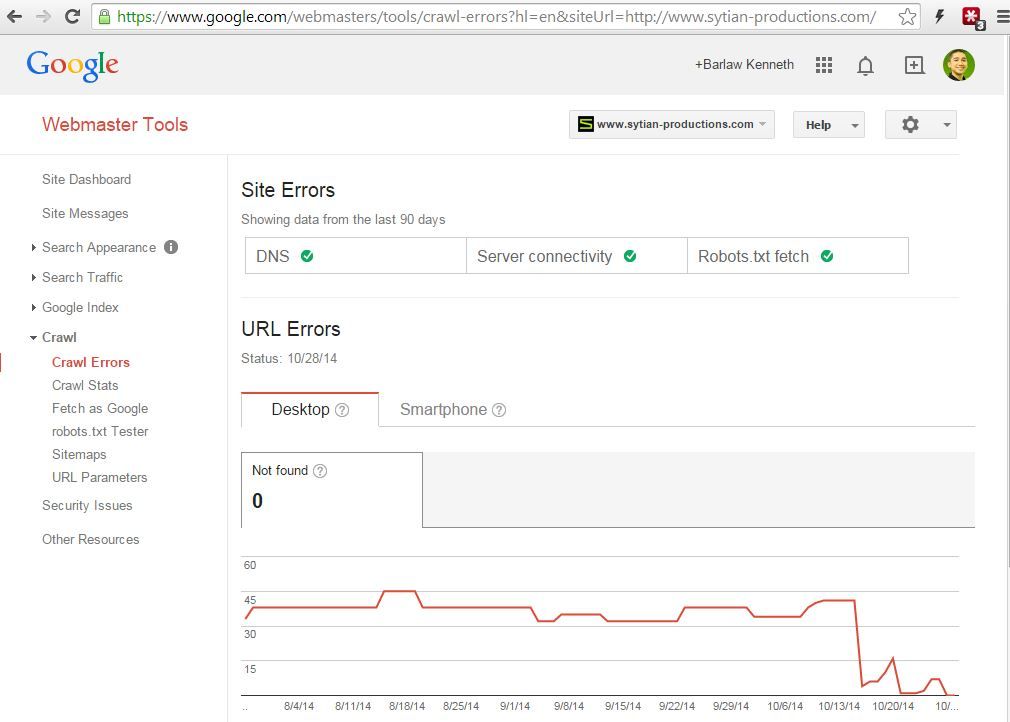
22.) Constantly monitor for crawl errors.
It is important to regularly check your site for crawl errors because they have an impact on both user experience and SEO. Log in to your GWT account and navigate to Crawl > Crawl Errors. This page will give you two types of errors. Site Errors (errors that are preventing Google from accessing your entire site) and URL errors (errors that prevent Google from accessing specific pages in your site). If you see errors, it is urgent that you fix them. Webmaster Tools Help explains the different kinds of errors and how you can fix them.
23.) Regularly check your search engine rankings.
After a complete website redesign, it is common to see a slight drop in your SERP rankings. Furthermore, I have seen a website that dropped from page 1 to page 5 after a redesign but it bounced back to page 1 after six days. If your ranking dropped massively and did not regain the rankings after two weeks, you may want to consider these factors.
- Did you change title tags and URLs?
- Did you use H1 and H2 tags?
- Double check your robots.txt, .htaccess, meta noindex tags and CMS configuration and make sure your website is crawlable and allows indexing
- Check for Incorrectly placed rel=canonical tags
- Did you over-optimize your website?
- Do you have duplicate contents?
- Was there an algorithm update a few days before you launched your new website?
- Make sure you have 301 redirects
*** PRO TIP : If you’ve done everything you can to regain your rankings and not much has changed in six weeks, you might consider resorting to the worst case scenario – revert to the old website.
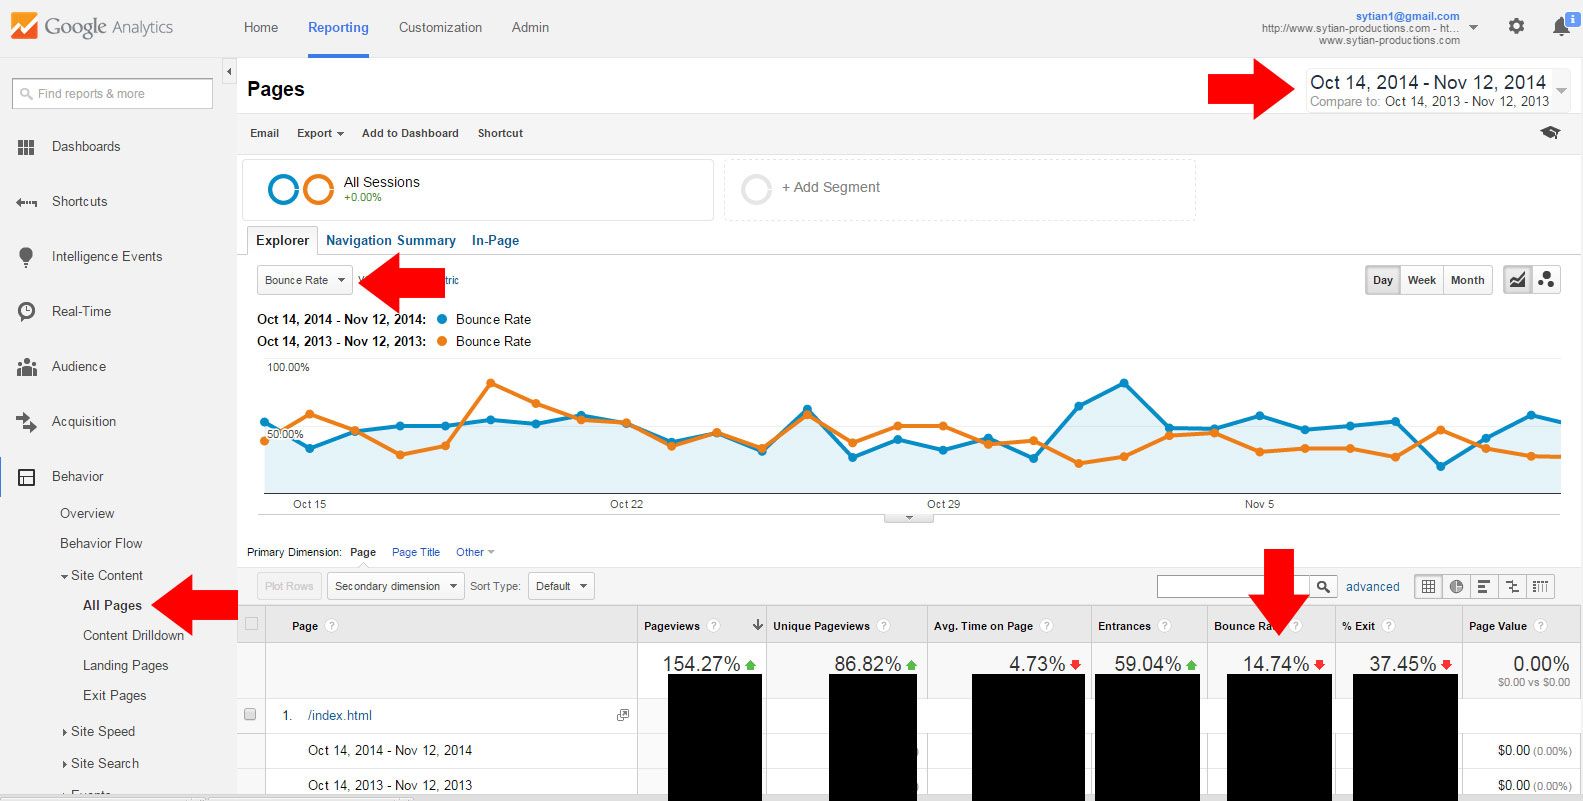
24.) Compare bounce rate and conversion rate between old website vs. new website.
Another important metric to monitor post-launch are your bounce and conversion rates. You will want to check this at least one month after your rebuild so you can gather enough data first. To check the bounce rate, log in to your GA account and navigate to Behavior > Site Content > All Pages. To check the Conversion Rate navigate to Conversions > Goals > Overview. On the Date Range, make sure you put a check-mark on the “Compare to” field. Then, select the dates you want to compare. The first date range should be before your website redesign and the second date range should be after your website redesign. If your new website has a significantly higher conversion rate and a lower bounce rate, then you know that you did a good job in your website redesign. If it’s the opposite, then you should consider reading Reduce Bounce Rate: 20 Things to Consider to decrease bounce rate and 13 Ways to Increase Your Conversion Rate Right Now.
*** PRO TIP : Make sure you compare the same month or date ranges especially if your product or service is seasonal. If your website is selling Christmas decors, then you may want to compare the data from Dec 1 – Dec 25, 2013 for the old website and Dec 1 – Dec 25, 2014 for the new website. You may get inconclusive interpretation of your data if you compare different dates due to seasonality effects on your website.
Conclusion
SEO should be one of the core factors that you consider during a website redesign. Focusing on just the aesthetics and creative elements of the website might cripple your website in terms of organic search performance and traffic. What’s the use of a beautifully designed website if no one can find it? I hope this list can help you achieve a hassle-free website redesign.
Do you have any tips to prevent SEO loss during a website redesign? Share them in the comment area below.
